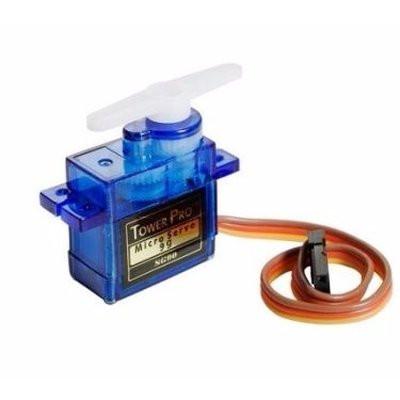
Servo motors use feedback to determine it’s position, therefore they can be used to control the position of objects, rotate objects,various parts of a robot with high precision. The size of a servo motor is considerably small and with their built in circuitry, they can be connected directly to a micro-controller. Servo motors were first used in the Remote Control (RC) world, usually to control the steering of RC cars or the flaps on a RC plane. With time, they found their uses in robotics, automation, and of course, the Arduino world In this article, we’ll look at how to interface a servo motor with an Arduino UNO micro-controller.


Most servos you’ll see around have three connections
- Black/Brown – ground wire
- Red – +Ve wire
- Orange/Yellow/White – signal wire
Servo motors run on 5V, so it can be powered directly from your Arduino 5V port.
You’ll need the following to carry out this project
Hardware
Software
- Arduino IDE, download here
Step 1: Circuitry

arduino-servo circuit
Step 2: Upload the code
Fire up your Arduino IDE and follow the instructions below
- Click on File
- Go to Examples
- Select servo, Sweep
- Or you can copy the code below
- Click on upload
|
1 2 3 4 5 6 7 8 9 10 11 12 13 14 15 16 17 18 19 20 21 22 23 24 25 26 27 28 29 30 31 32 33 34 |
/* Sweep by BARRAGAN <http://barraganstudio.com> This example code is in the public domain. modified 8 Nov 2013 by Scott Fitzgerald http://www.arduino.cc/en/Tutorial/Sweep */ #include <Servo.h> Servo myservo; // create servo object to control a servo // twelve servo objects can be created on most boards int pos = 0; // variable to store the servo position void setup() { myservo.attach(9); // attaches the servo on pin 9 to the servo object } void loop() { for (pos = 0; pos <= 180; pos += 1) { // goes from 0 degrees to 180 degrees // in steps of 1 degree myservo.write(pos); // tell servo to go to position in variable 'pos' delay(15); // waits 15ms for the servo to reach the position } for (pos = 180; pos >= 0; pos -= 1) { // goes from 180 degrees to 0 degrees myservo.write(pos); // tell servo to go to position in variable 'pos' delay(15); // waits 15ms for the servo to reach the position } } |
Results
If you did everything right, your servo motor should rotate 180 degrees in a clockwise motion and vice versa

Wanna do more????
You could build a Bluetooth mobile phone controlled R.C car
Extra part needed
- 2WD motor kit, buy it here
Refer to this article on interfacing a HC-05/HC-06 Bluetooth module with your mobile phone.

 Arduino & Microcontrollers